 Shipping on a Mac.
1. Setting up UPS shipping to print to your thermal printer
- a)
- b)
- c)
- d)
- e)
- f)
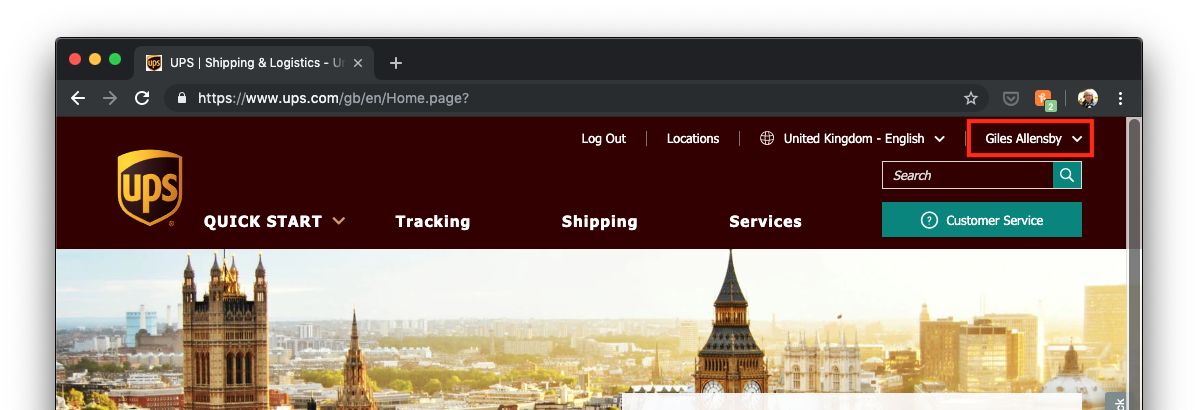
On the UPS website click your name in the top right to access the menu.
Select Preferences from the menu.
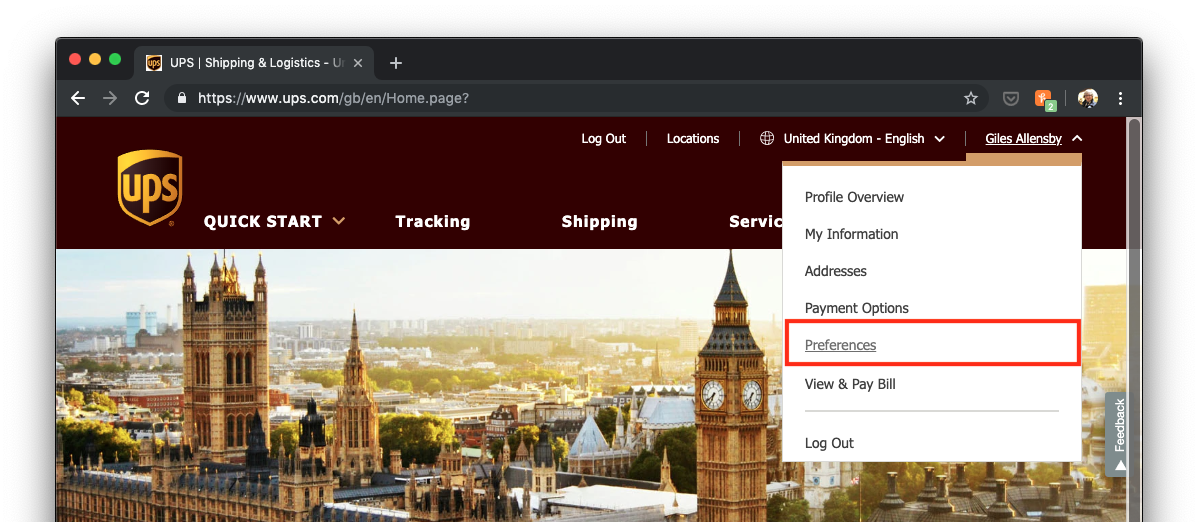
Click Edit under the Shipping section.

Scroll down to the Printing section and expand it by clicking on it
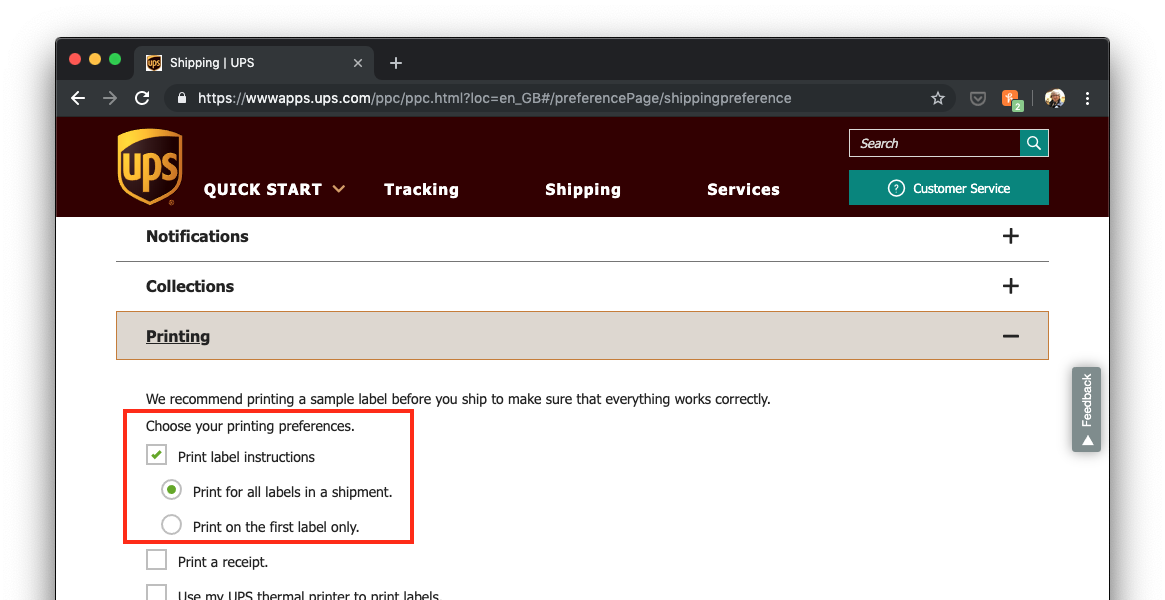
Ensure that Print Label Instructions and Print for all labels in a shipment are selected.
Do not select Use my UPS thermal printer to print labels as this will not work on a Mac
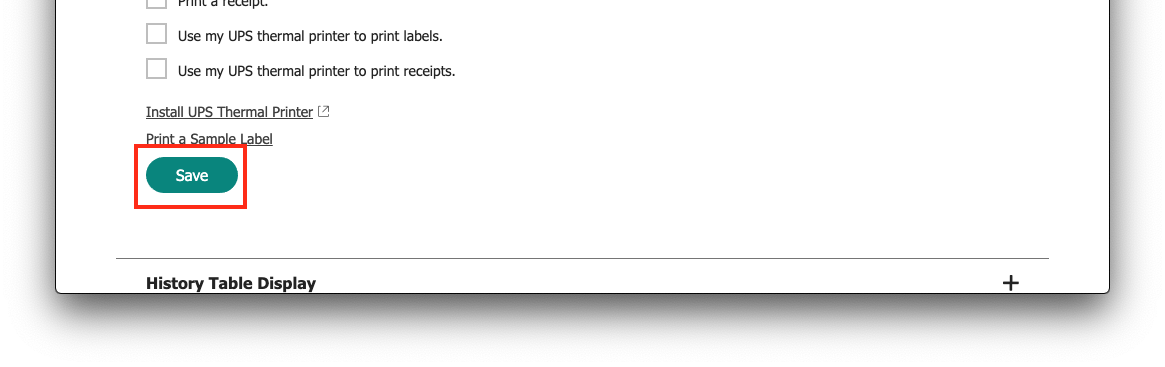
Click Save to save the changes
2. Download a PDF sample label
- a)
3. Setting up your thermal printer for printing from the UPS website
- a)
- a1)
- b)
- c)
- d)
- e)
- f)
- g)
- h)
- i)
- j)
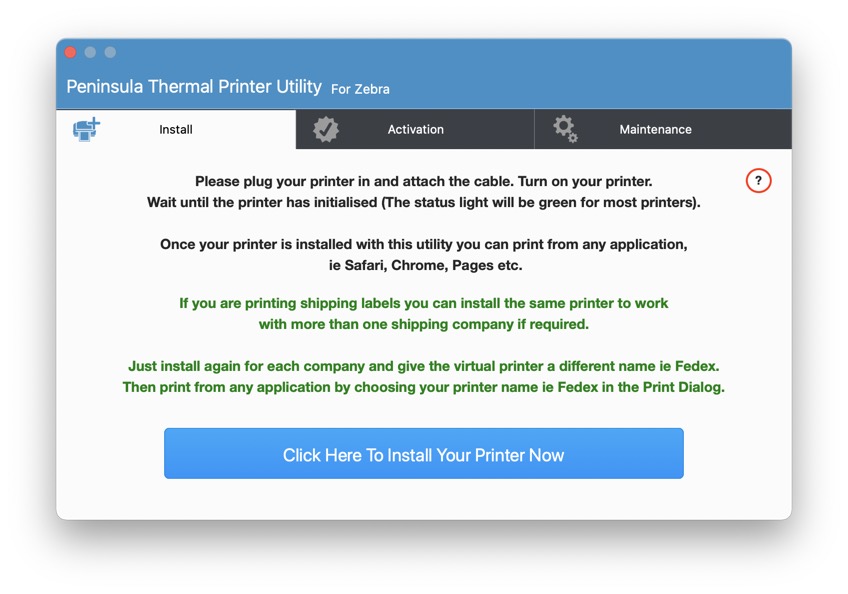
Open the Thermal Utility enter your computer password to allow the drivers to install
and then click "Click Here To Install Your Printer Now".
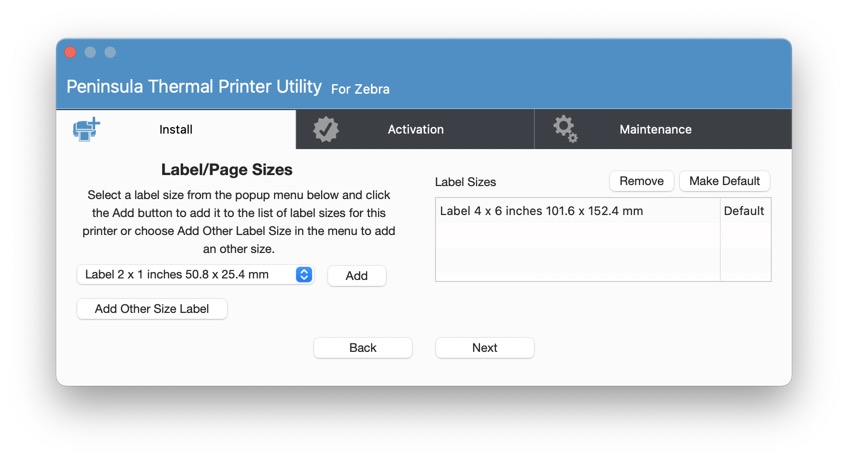
Follow the onscreen steps until you reach the "Label/Page Sizes" step and choose 6 x 4 inches from the popup and click "Add".
Click the "Next" button.
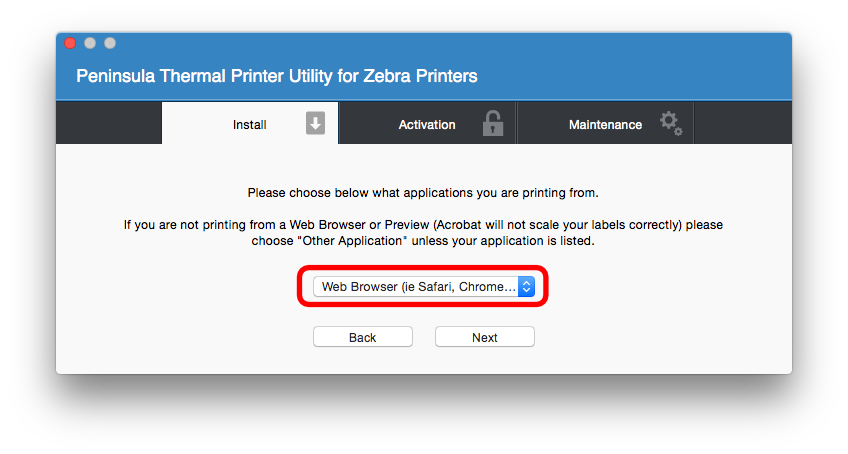
Follow the onscreen steps until you reach the "Choose what applications you are printing from" step and select
"Web Browser (ie Safari, Chrome etc)".
Click the "Next" button.

Select "UPS Website" from the menu.
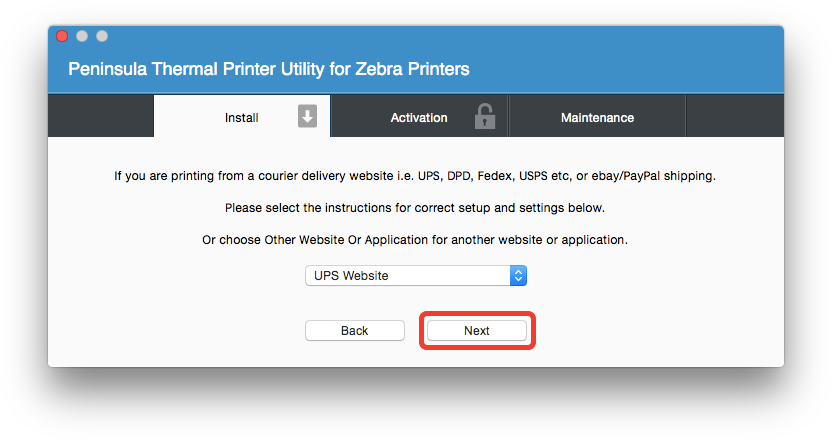
Click the "Next" button.
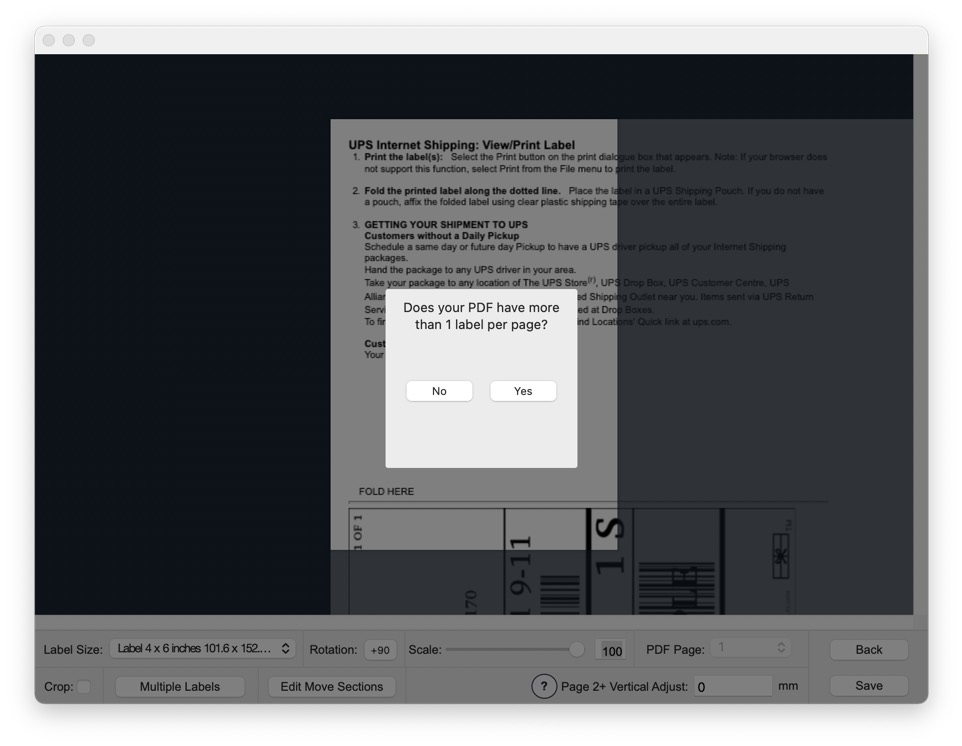
A window will open as shown above.
Click No and drag the PDF file we downloaded earlier onto the window.
Set the label size to the correct size of your labels using the Label Size popup.
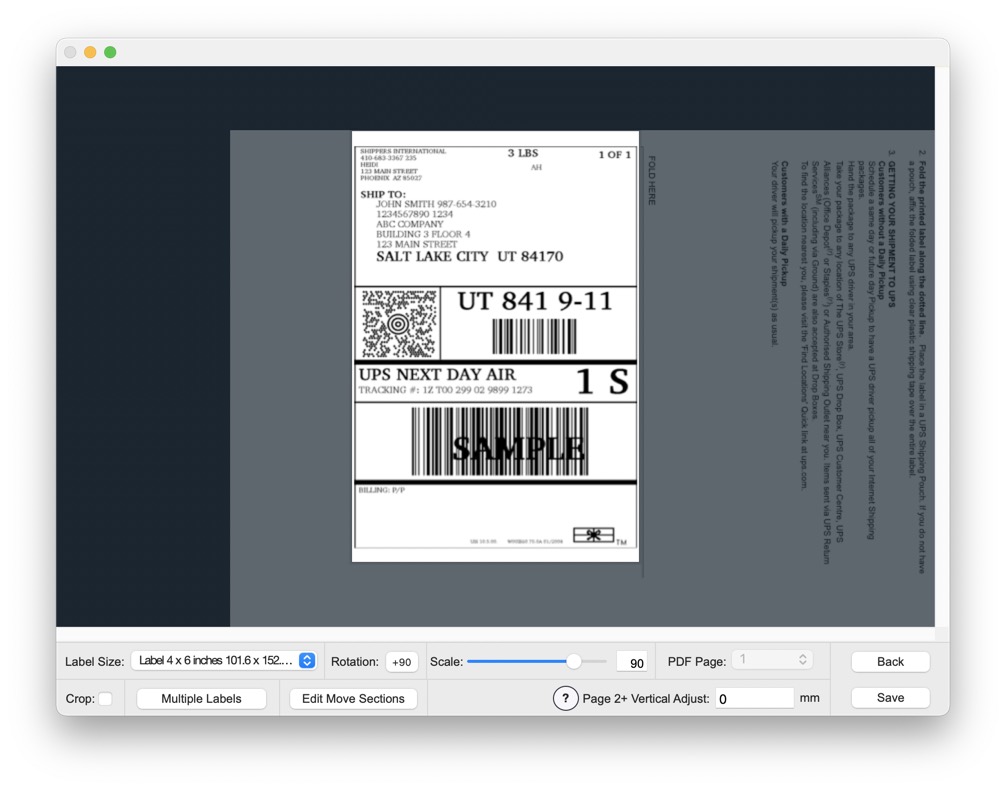
Drag the image and use the controls at the bottom to correctly position the area you wish to print (the label section) onto the label.
Click the Rotation button to rotate the label so it is upright like the picture. Set the scale to 90%.

When it is positioned correctly click save to save the extraction settings.
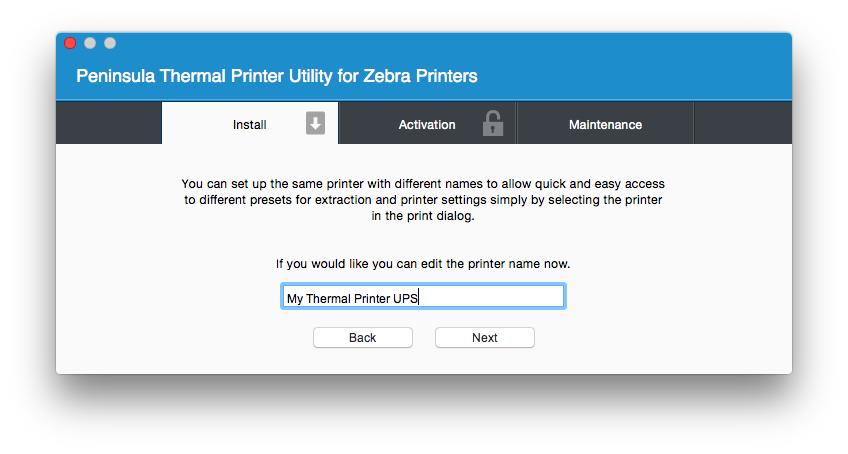
As this printer is now set up specifically for the UPS website we recommend giving it a different name and allow you to change this.
You may install the same printer multiple times with different settings and a different name using the Thermal Utility allowing you to set the extraction up for different websites and applications and simply choose the printer on the print dialog to print with those settings. Click next when you are happy with the name.
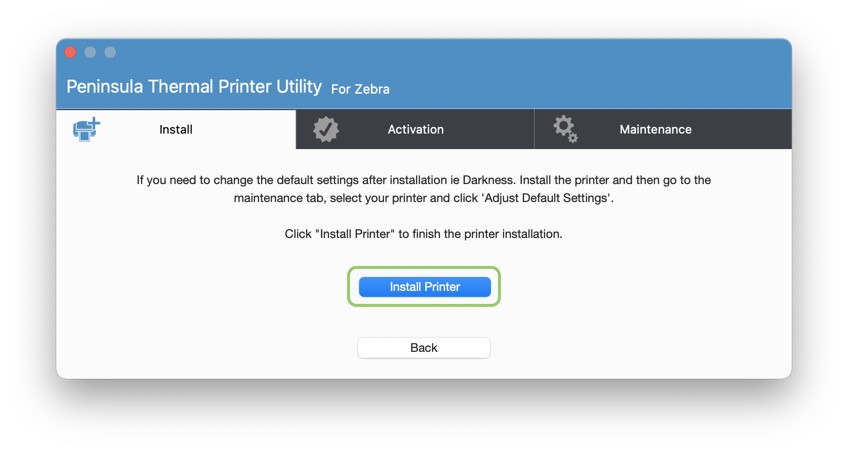
Click add printer.
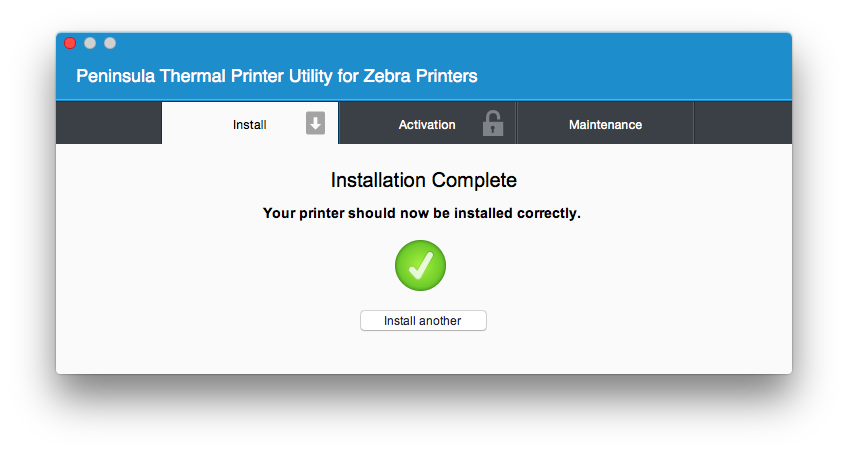
The installation will take a few seconds and then the installation complete message will show. The printer is now installed and you may close the Thermal Utility.
The setup is now complete simply return to the UPS website and print your labels selecting the printer we just installed.
Remember to choose "Extract from Page" as the page size when printing.
Remember to choose "Extract from Page" as the page size when printing.